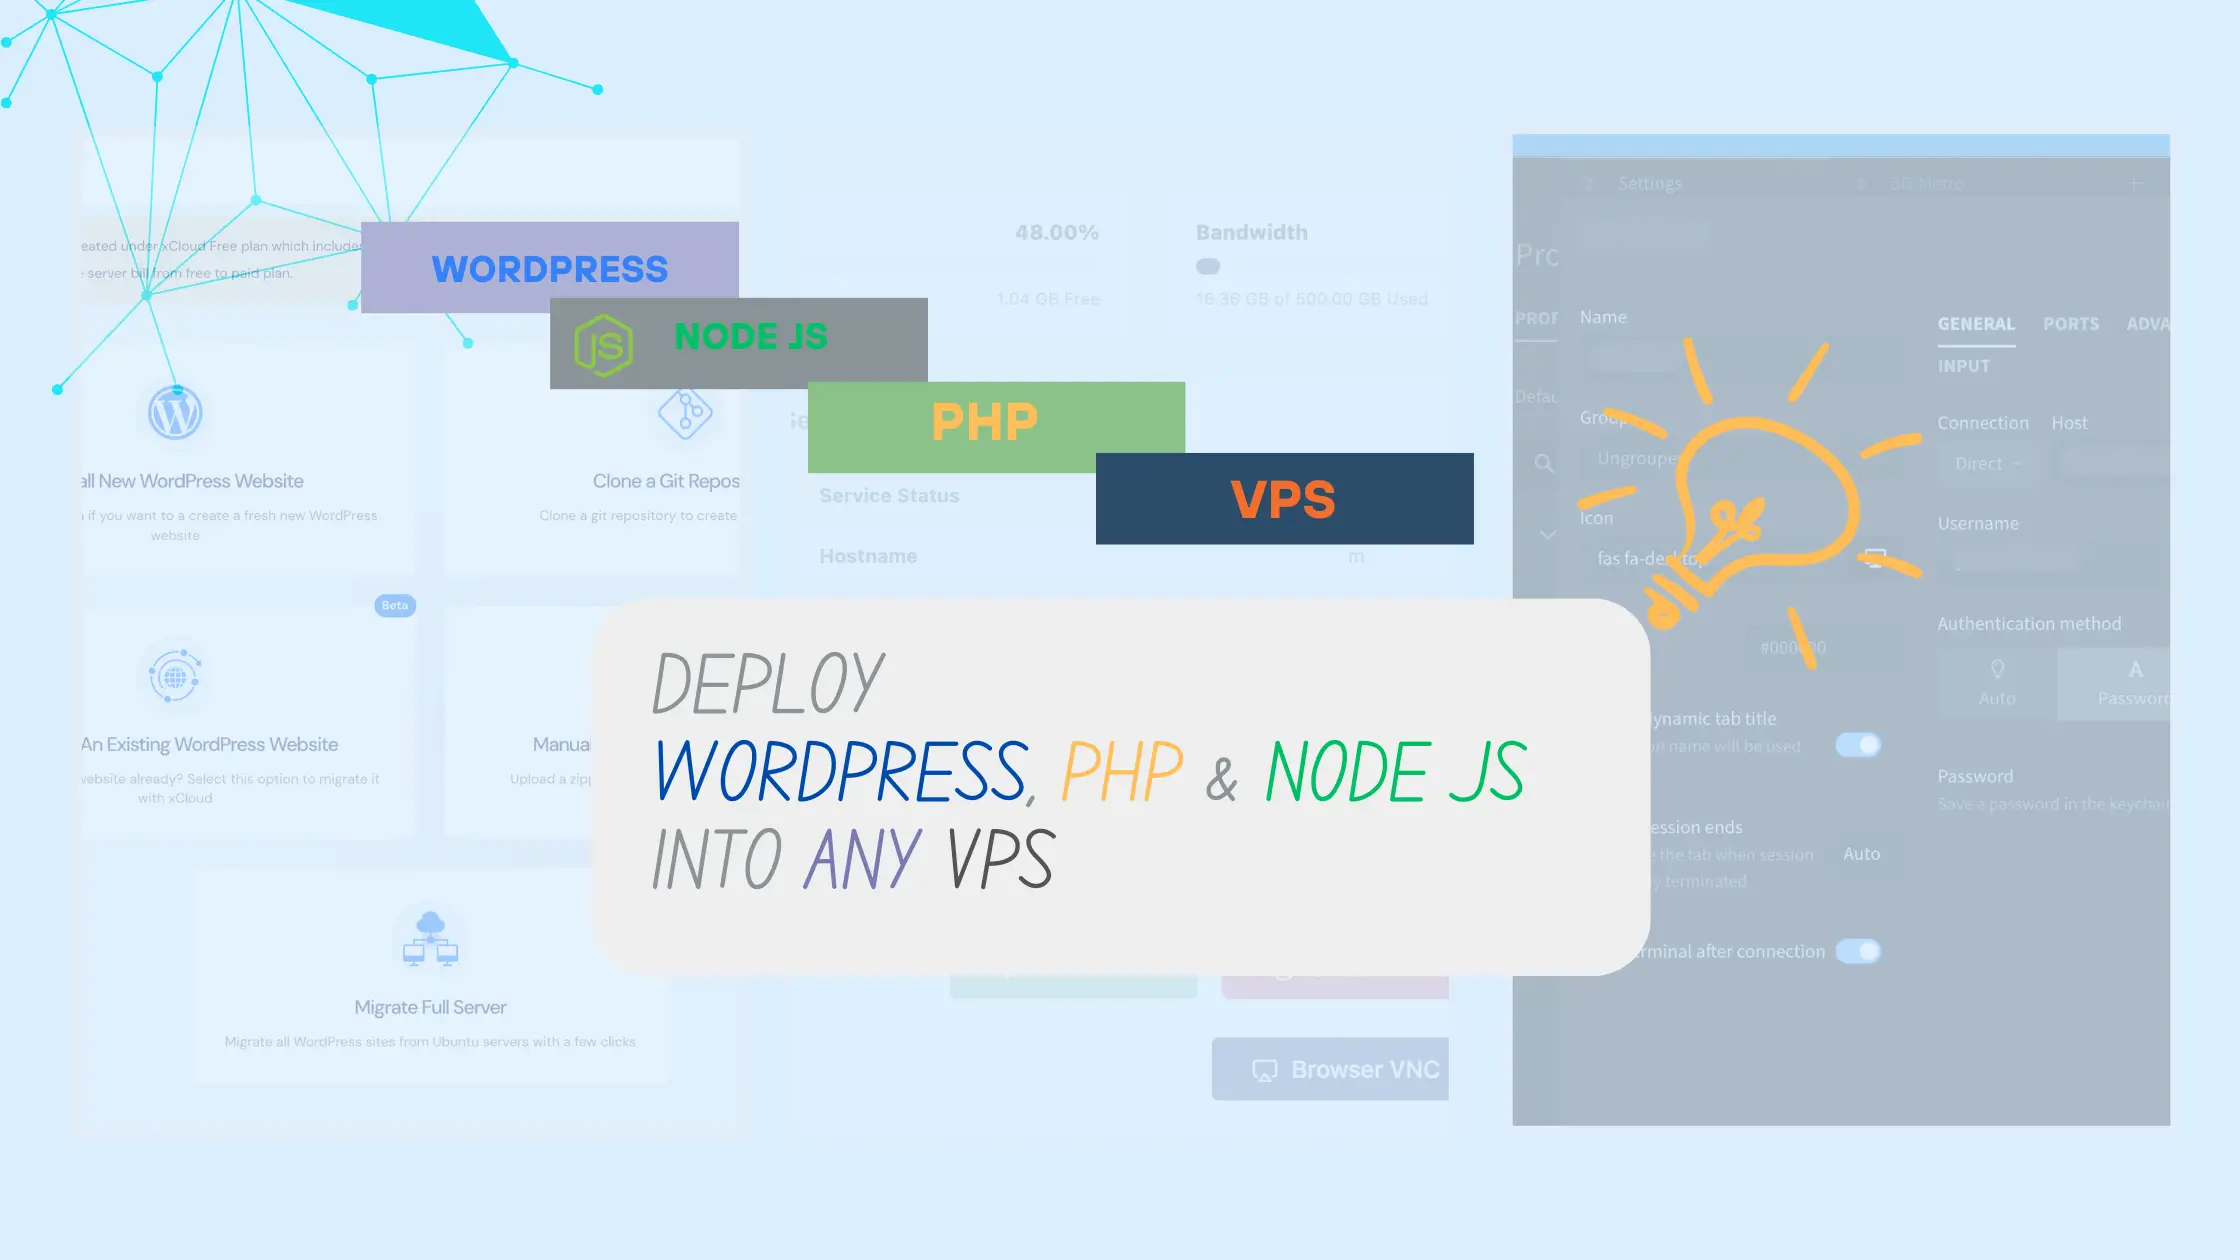
Table Of Contents:
- Why VPS
- VPS credentials
- Connecting VPS to any Control Panel
- Connecting xCloud
- SFTP connection to directly access the VPS machine
- Deploy PHP applications
- Deploy node js app
Why VPS
VPS is the best choice available considering extended control, performance, and scalability. Particularly because of the traffic spikes.
Full root access made possible by VPS lets users install custom applications and change the server to fit their requirements.
It’s best when you wish to accomplish more than what some shared hosting providers allow.
Better performance and flexibility are provided by VPS; cPanel is recommended for its simplicity and maintenance ease.
On cPanel, you may have all you need: set up email, backup, SSL, PHP tools, and even FTP connections. But you can set up your VPS using some simple and free tools to accomplish those things.
In this article, We will install some free tools into your VPS to deploy WordPress and PHP websites as well.
There are some providers sale VPS at cheap prices with a good configuration. Prices may vary from 4$ per month to 100$+ based on machine memory and configurations.
Let’s set up VPS.
Collect your VPS credentials
Go to your VPS dashboard to set up the first server. Select the machine configuration you prefer. Here is an example server with a Ubuntu setup. Your VPS dashboard may look different but the credentials type will be the same.
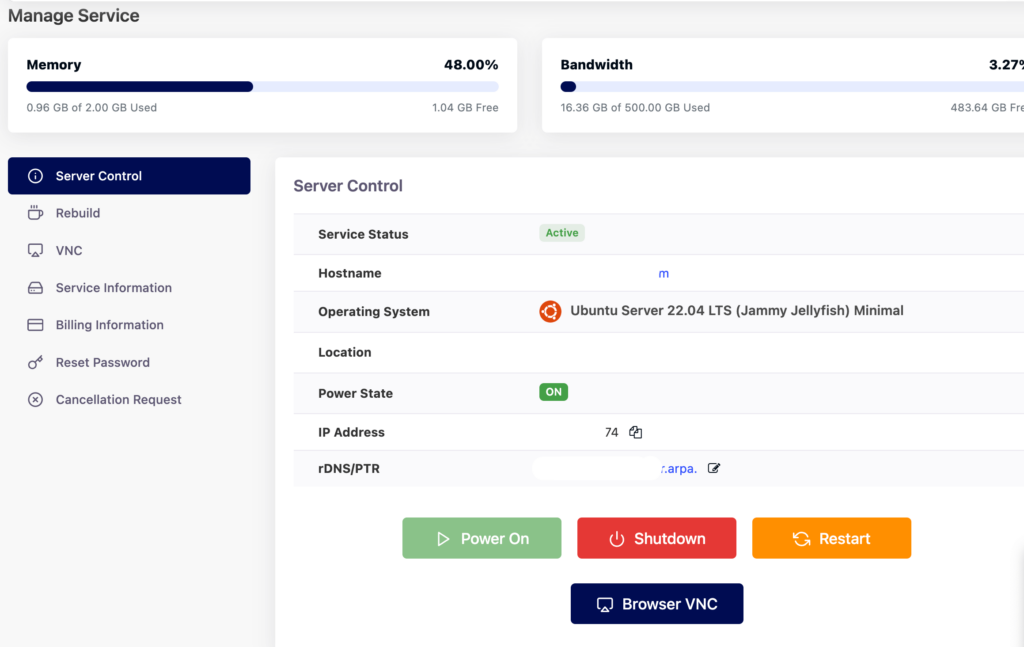
Check your VPS provider dashboard for IP address, Port, Login Username and Password.
Sometimes you may find them in your email, check spam if not found or contact your provider.
Credentials you may need:
IP: 10.*.5.7*
Port: –
Username: username
Password: ****
Connecting VPS to a Control Panel
There are some free VPS control panels to manage the web, email, node js, WordPress, and database servers. Some popular control panels are CloudPanel, VestaCP, Webmin, aaPanel, CyberPanel, xCloud etc.
I prefer CloudPanel personally to manage any server and for WordPress, xCloud is super easy.
Connecting xCloud
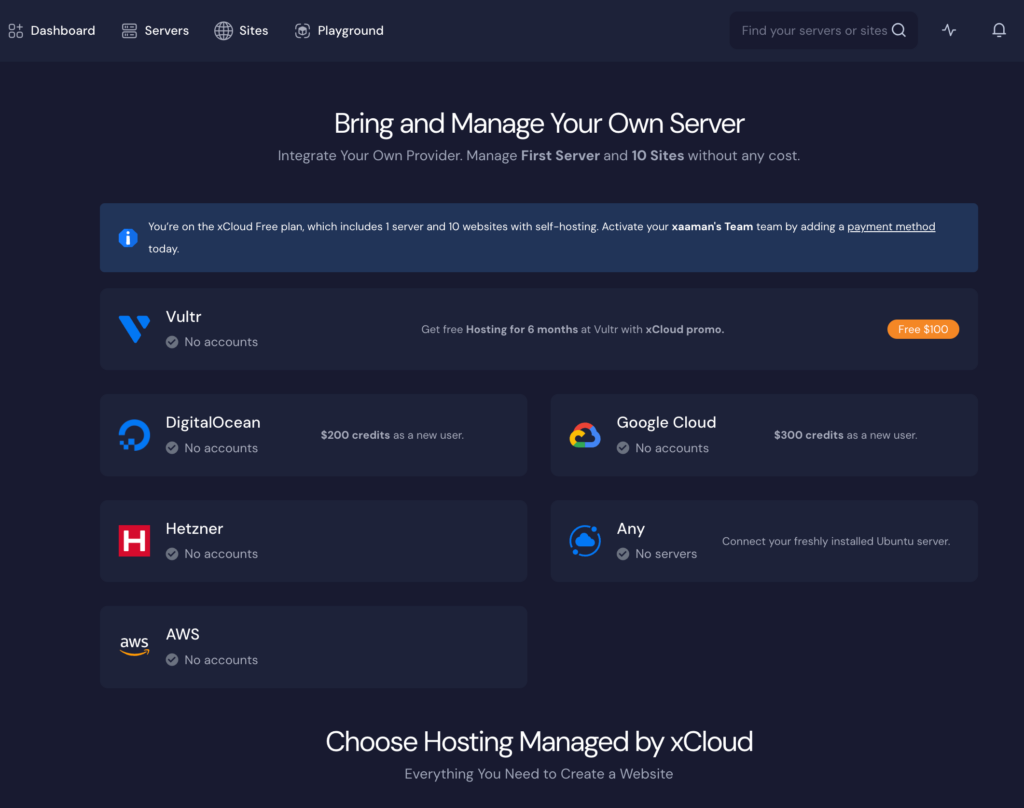
Let’s use xCloud a freemium hosting service provider dedicated to WordPress management. Using the free version, we can create 1 server with 10 WordPress sites, which is enough for us. You may use CloudPanel or others as well.
Create an xCloud account and log in to your dashboard to create your first server. Select the provider; if your VPS provider is not on the list, use any.
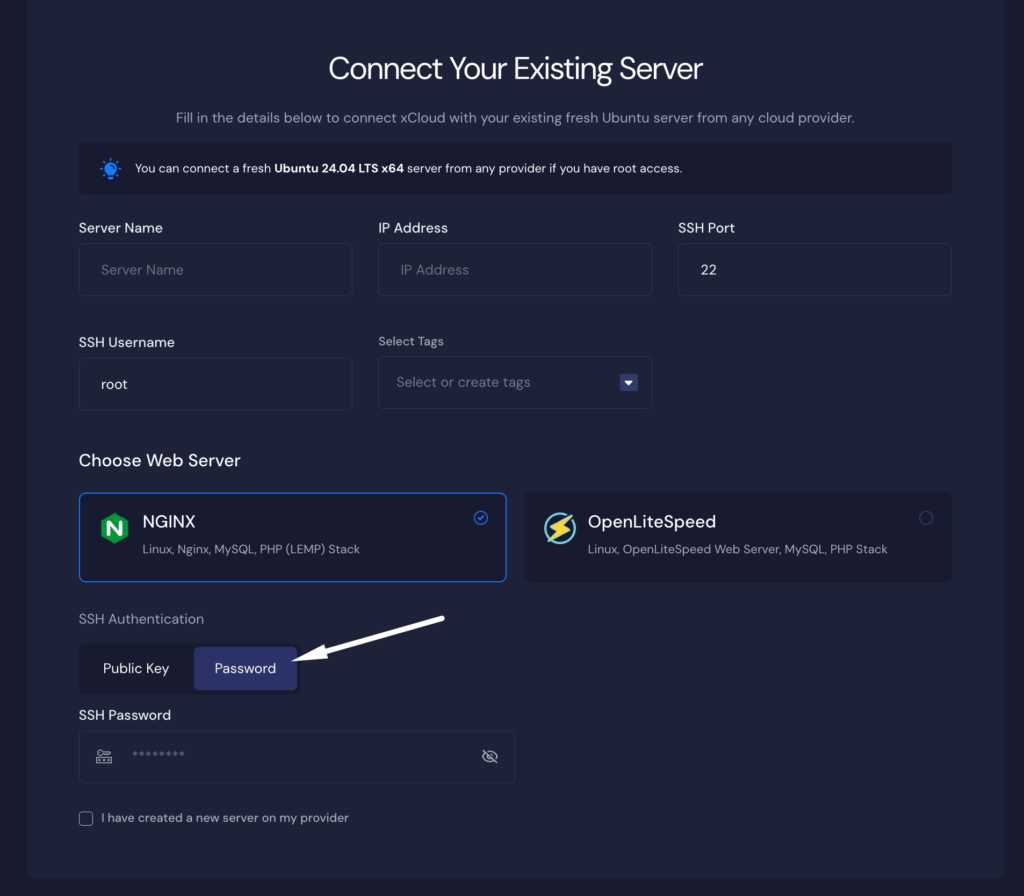
You will get a login panel in the first step. Please provide your VPS info that you got from your VPS provider. Select password authentication if you have one. I prefer to choose Nginx for WordPress.
Follow the instructions to complete the server configuration.
Deploy and Manage WordPress for free
If you have already connected the server with xCloud or cloudPanel then it’s almost done.
Now create your first site using your CloudPanel or xCloud dashboard.
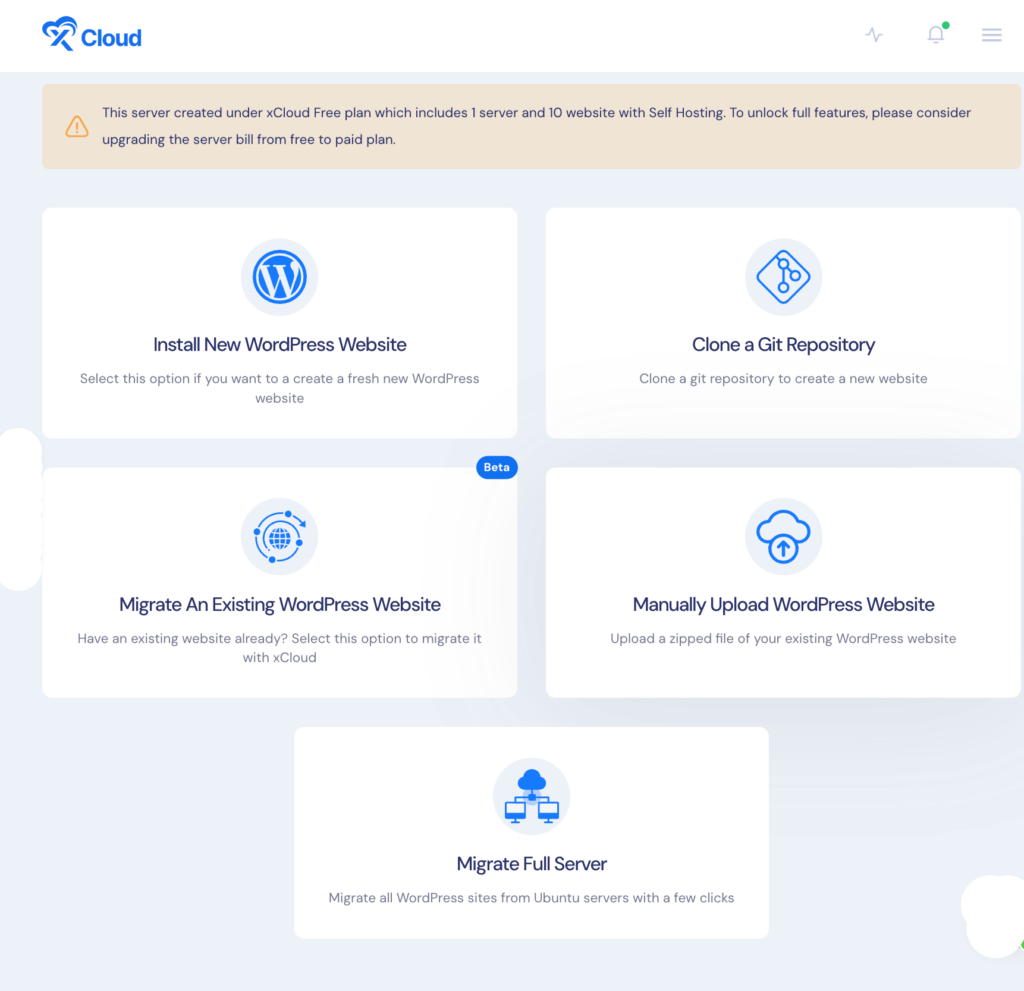
It will ask for some information like the PHP version, WordPress site name, User credentials, Domain name etc. Please fill in all the information. After Completing the guided process It will ask for a primary domain name or use the demo domain from Xcloud. You may edit the primary domain to connect your main domain to it. Just edit the primary domain and select “go live” then add the DNS record to your domain DNS settings.
You may find the advanced settings and configurations from the left side panel. You can access the Database and file manager and also can customize the WordPress config file from here.
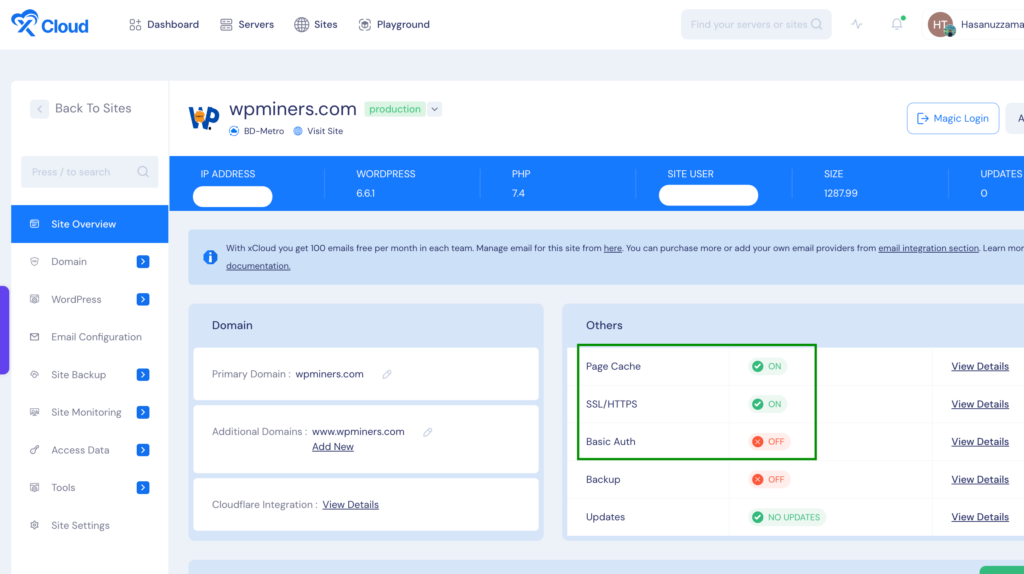
All done your first site is successfully deployed into your VPS.
Setup a Free email service
By default, xCloud provides free 100 emails per month in the free package, which is not much. But there are some free email providers with the best free packages. Brevo (SendInBlue) is one of them with free 300 emails per day.
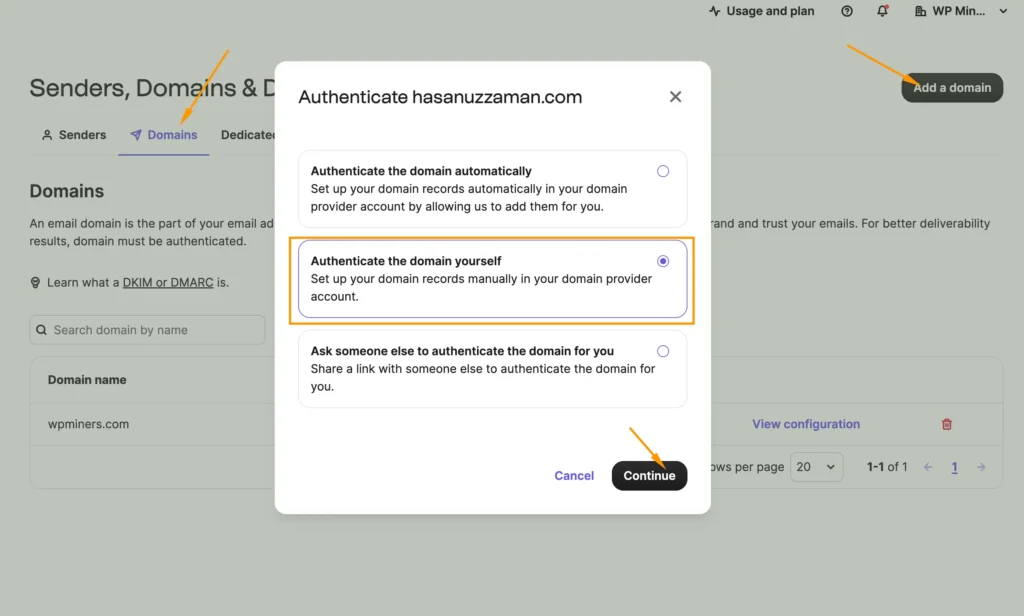
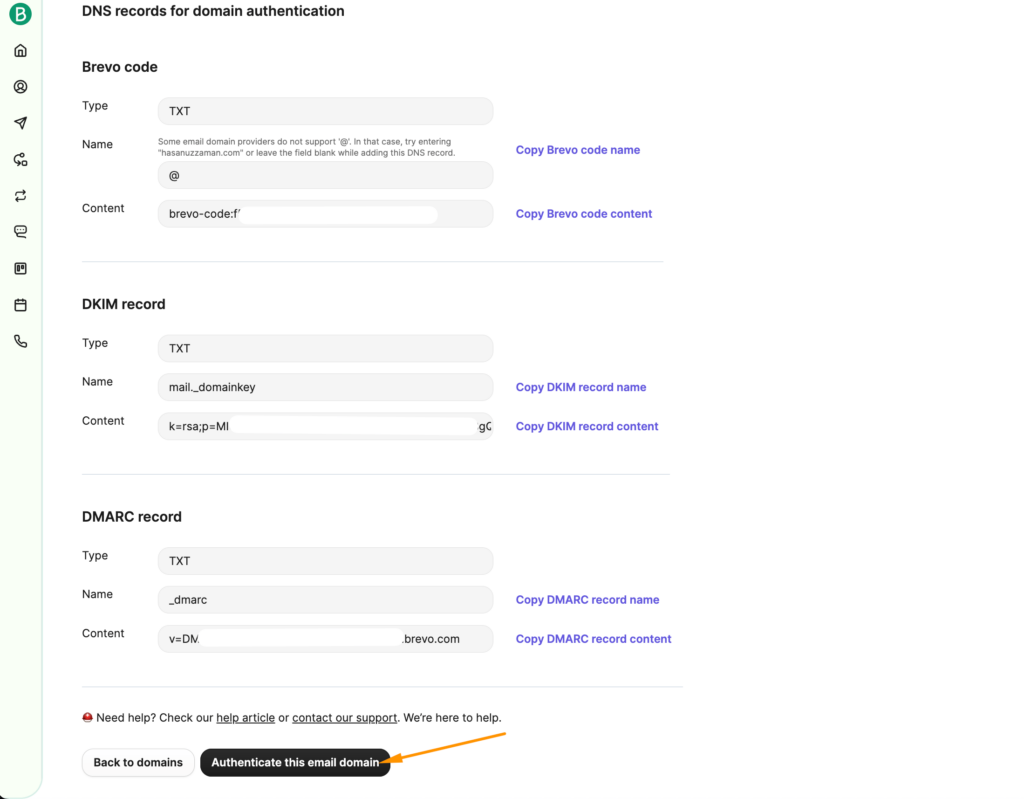
To set up, just create an account at Brevo. Go to the Senders domain list from the right corner of the dropdown > Senders, Domains & Dedicated IPs > Domains.
Add your domain and select Authenticate the domain yourself. Then It will show some DKIM or DMARC records to set up in your domain.
Here is the Cloudflare domain DNS setup page.

Go to your domain DNS page in your Domain provider dashboard and add all of them. Then click on Authenticate this email domain in your Brevo domain window.
Then go to your xCloud site settings select Email configuration from the left sidebar and choose Brevo as email provider.
All done and now you have a secure WordPress website with email service up to 300 per day completely free.
SFTP connection
You can manage and access your remote machine directly from your computer. You may use any terminal from your device like iTerm, Tabby, shell, or any bash terminal.
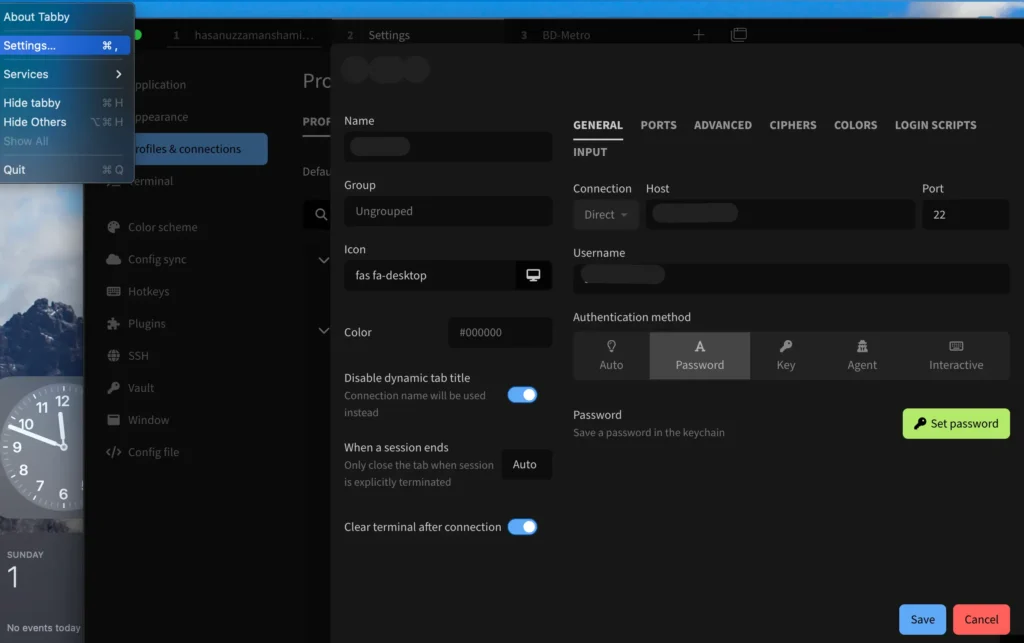
I prefer to use Tabby which is an open source terminal app with SFTP access. Just download and install Tabby.
Go to settings > profile settings and create a new profile with the server credentials that you have collected before. Select the Authentication method as password and save the profile. Then click on the profile play icon.
All done! Go to the terminal and from the right corner you will see the SFTP option.
Just click and browse the SFTP to manage your files directly on the remote server.
Deploy PHP application
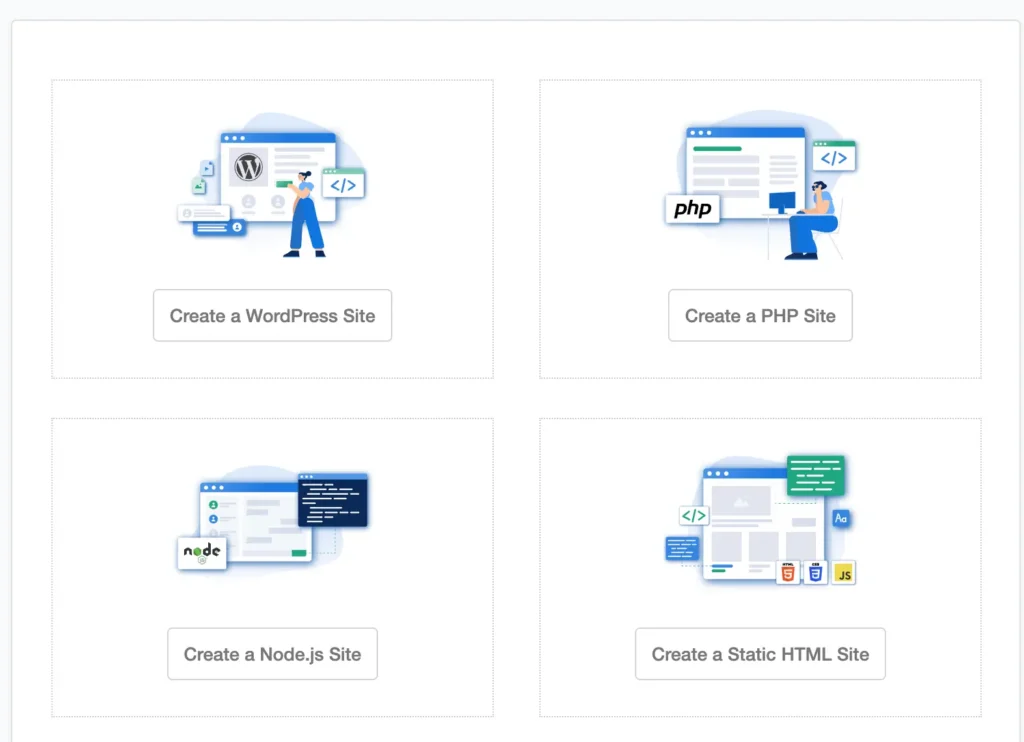
You can easily deploy your PHP application by clicking “create a PHP site ”in your cloudPanel dashboard.
It’s also easy to deploy your PHP application if you are using xCloud.
- To create using xCloud – Just create a fresh WordPress website with a demo domain.
- From the Tabby terminal or the SFTP, navigate to the /var/www directory, you will get all the sites you created.
- Find the site you want to deploy as a PHP application and remove all the content from it.
- Upload your PHP application on it
All done! The site deployed successfully!
NB: If you are using the Nginx server you will get the domain config file from /etc/nginx/sites-available, edit your site if you want to update the path manually. Or use the xCloud site manager.
Deploy Node js application
Deploying node js application like a BOT or and backend is as simple as pie. You don’t need to create any site. If you want to use CloudPanel then you will get an option to create a Node.js site from the dashboard.
Or create your node app manually:
Step 1: Check and install the node environment
- Check the node.js is installed or not by “node -v”, if not then install node
- Check whether the npm is available or not by command “npm -v”, if not then install it globally
Step 2: Upload your node app
- Go to the terminal and change directory /var/www. Create a new directory using the command “mkdir myapp” or use SFTP to make a directory.
- Upload your node application using SFTP to the remote server.
Step 3: Run the node app
Now run your node app by npm command, but if you close the terminal the app server will stop. You have to keep the server up and running.
There are some npm packages to manage it. PM2 is one of them. PM2 is a daemon process manager that will help you manage and keep your application online 24/7
Install PM2 globally:
sudo npm install -g pm2Run the application app file like this:
pm2 start app.jsThe application is now up and running!
Other commands:
pm2 list // check all running applications
pm2 stop // stop the running application
Please check the documentation to know more about it.
If you face any issues or have any queries please let me know in the comment section.
Leave a Reply